It was time to get serious about building the chicken coop. Either we built in time for the chicks, or the chicks would need it before we had time. Finding a place to put the chicken coop was our first obstacle. We have a great yard but not a whole lot of space to work with. We decided to go with a semi built storage shelf by our office nook where we kept our composters. Coming up with the plans was easy once we started jotting down our ideas.

Keeping with the simple logic, we decided to build our coop in two parts. A good poultry house protects the birds from the elements (weather), predators, injury and theft. Poultry require a dry, draft-free house. This can be accomplished by building a relatively draft free house with windows and/or doors which can be opened for ventilation when necessary. It is also necessary to build the coop on high, well-drained areas. This prevents prolonged dampness and water saturation of the floor of the coop and outside runs. Allowing an adequate level of space per bird also helps keep the humidity level in the coop to a minimum. The first part would be the actual coop house, where we would keep the nests for our future eggs. This section we would put in an elevated area. The next part would be a chicken run. This is the area that the hens will be able to cruise around and play in the dirt.
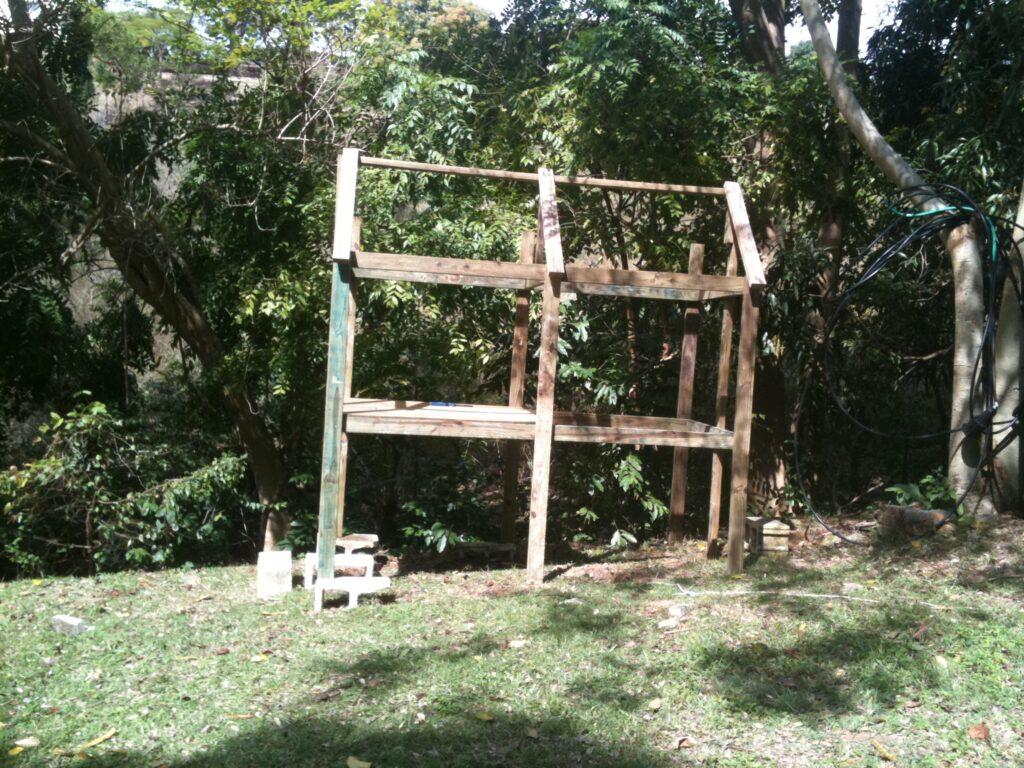
We started out by cleaning out the designated area, and building a frame to get an idea of what we would be working with. We wanted to keep as much as a natural element to the coop as we could, so we worked around existing branches and structures already available.

Once we got the frame up, we started to add the chicken wire. We built the chicken run area large enough for us to stand in. This will help with cleaning out the area in the future. The wire mesh we are using has a 1″ wholes. This is the recommended size for chickens. We also learned that it is much cheaper to by the wire mesh that they use for roofing. It is the same stuff that they sell for chickens. It is just marketed for a different use, and comes in a larger roll. The wire mesh we purchased is 20 gauge, 36″ wide and 150′ long. We will most likely only use half of what we purchased, but can use the rest in the future around our garden.

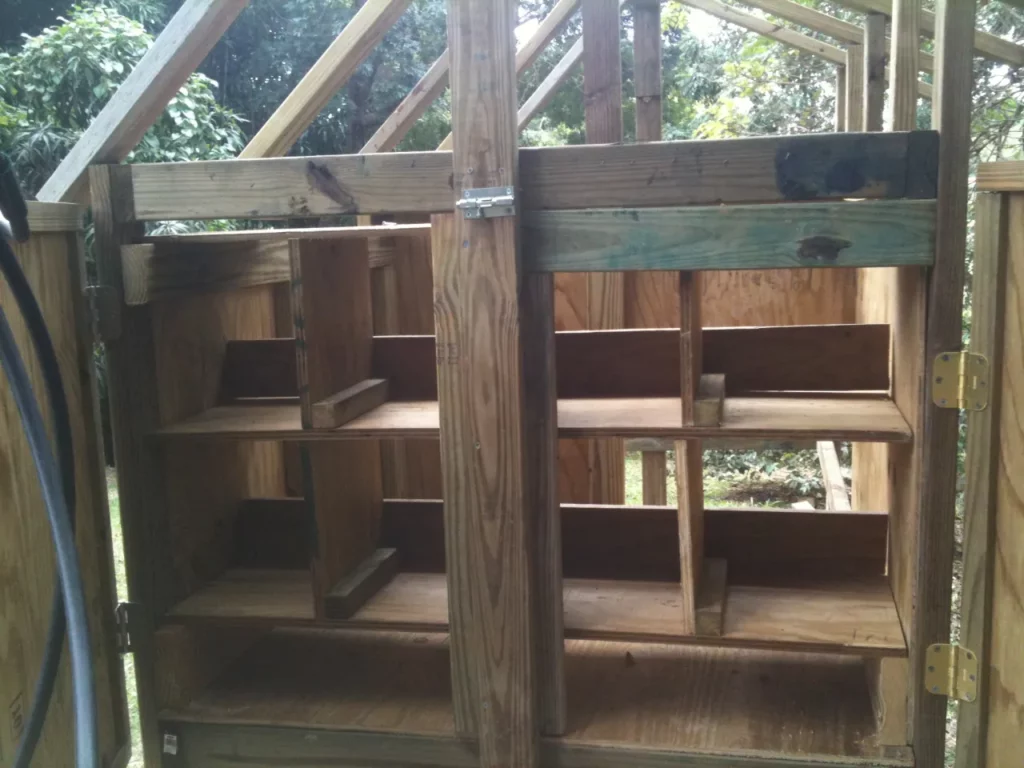
When building the actual coop house, we needed to make sure that the hen’s will have adequate space for movement and exercise as well as areas to nest and roost. It is recommended for egg laying hens to have 1.5 ft of space inside the coop, and 8ft of space in the run. We will also add perches for them to hang out on. With these chickens, we will provide 6 to 10 inches of perch space per bird. We will also provide them a nest. You should always provide at least one nest for every 4-5 females in the flock.
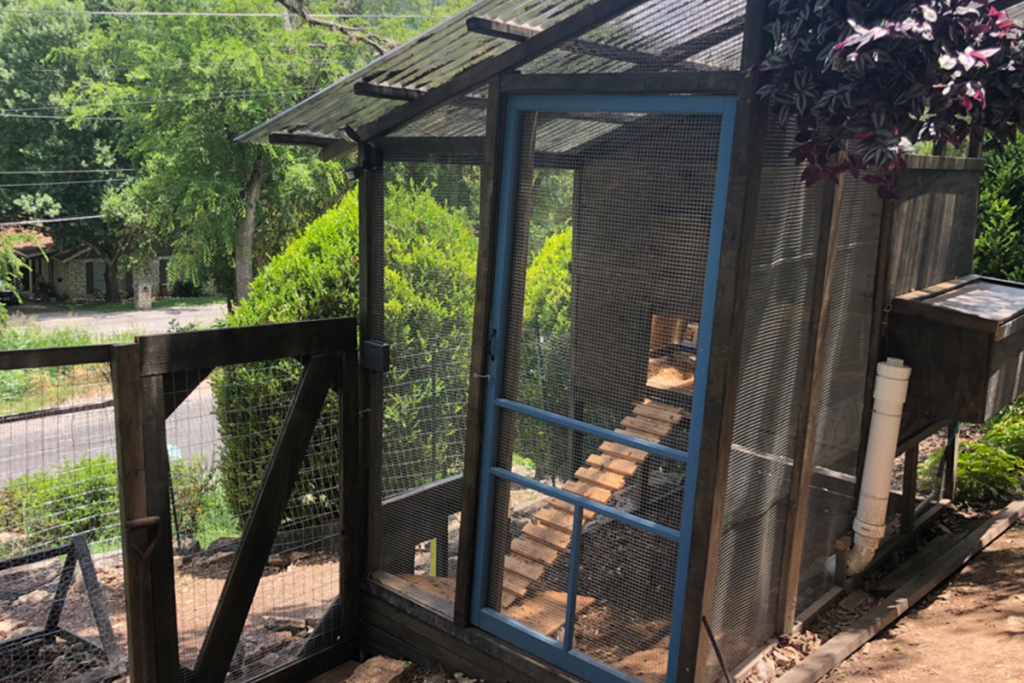
This is what the view looks like from inside the coop house, looking out to the run.
Slowly but surely it all starts to come together.We still need to add a pen door, as well as make sure everything is tight and secure from predators. Once we are done it will be important to remove any loose or ragged wire, nails, or other sharp-edged objects from the coop. We will also eliminate all areas other than perches where the birds could perch more than 4 feet above the floor. These extra measures could eliminate any injury to our birds and may prevent damage to the coop, as well.
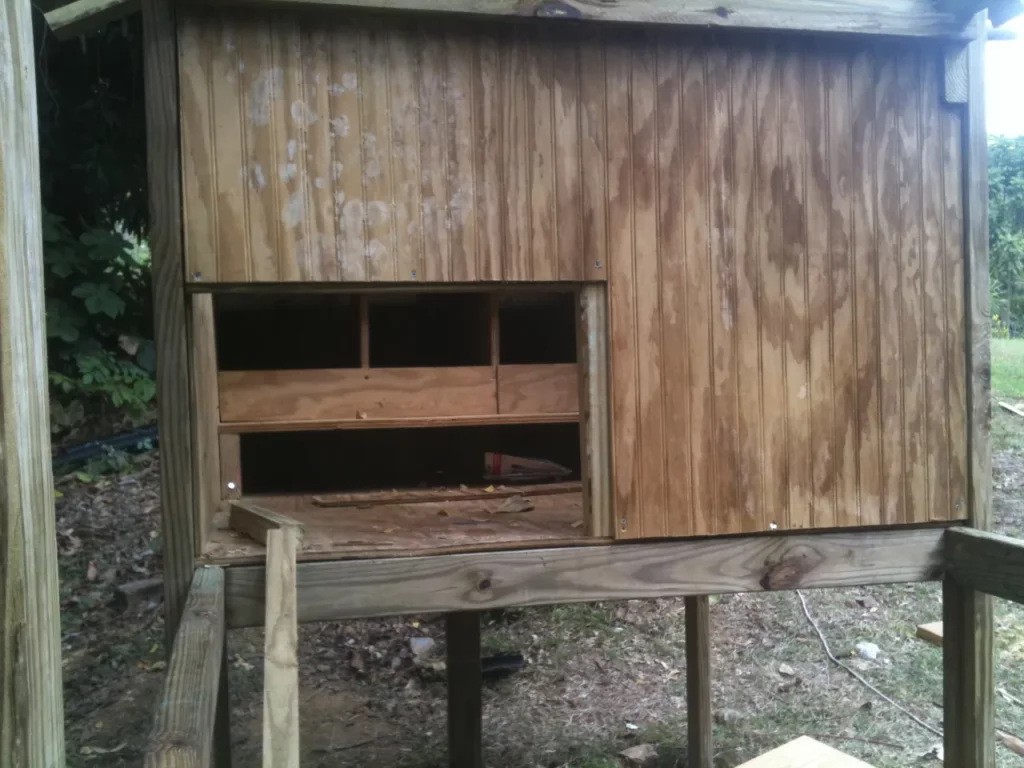
Once the coop house is done, we will retrieve our eggs from this door. We decided to leave the existing wood structure for the back wall to their house. This way they can enjoy some old old ivy vines for natural decor.
We built a raised floor in the coop area to assist in the ventilation as well as the cleaning and the collection of their waist for composting. The floor is built with the 1″ chicken mesh, raised about 4 inches off of the floor. We will place a large tray down below for easy collection of their waist before they move in.
This is a view from inside the chicken run area, up to the coop house. We are about 90% percent done with the coop. We should be finished with it by next week, giving us a few days of tweaking it out before the chicks will be ready to move in.


Leave a Reply