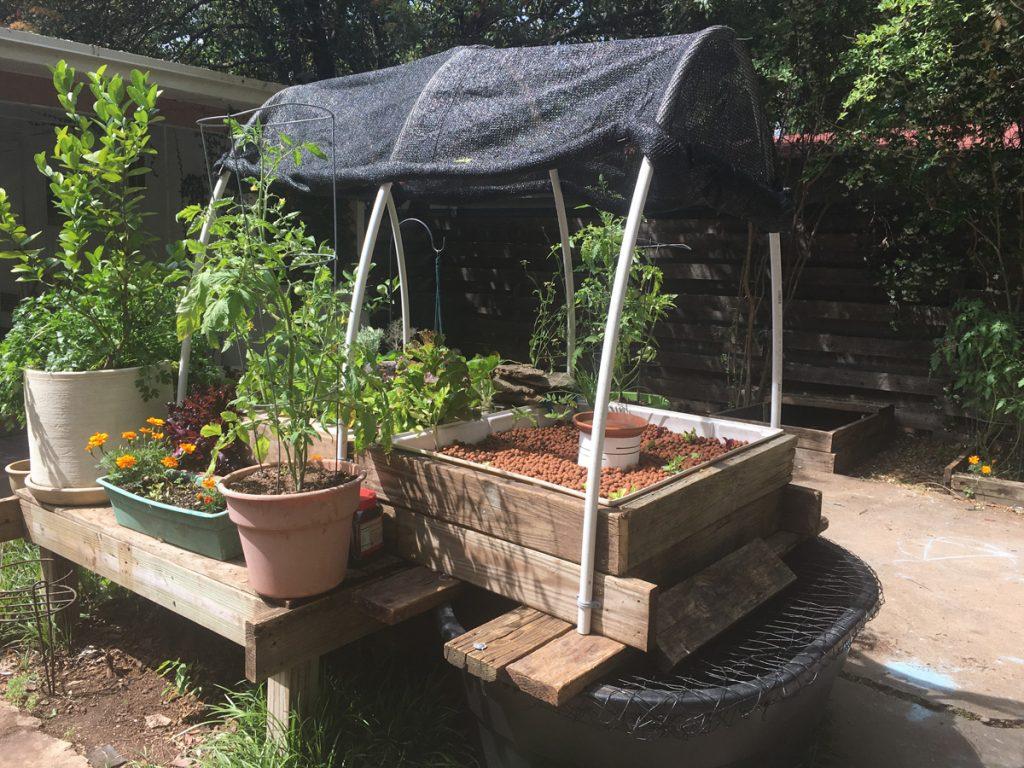
I recently had had the privilege of installing a new aquaponics garden into a family’s backyard in Austin, Texas. The aquaponics system was an extension to an existing garden that they had already been using to grow a combination of mustard and salad greens. The unit I went with was the most simple aquaponics garden that I have built yet, with the intention of making it easy to use maintain. Instead of reclaiming old parts, like IBC totes and rain gutters like I have done in the past, I purchased everything from shops. If you are interested in how to get started on your own home-scale aquaponics garden this is where you need to start.
What you need to get started on a backyard Aquaponics System.
Fish tank
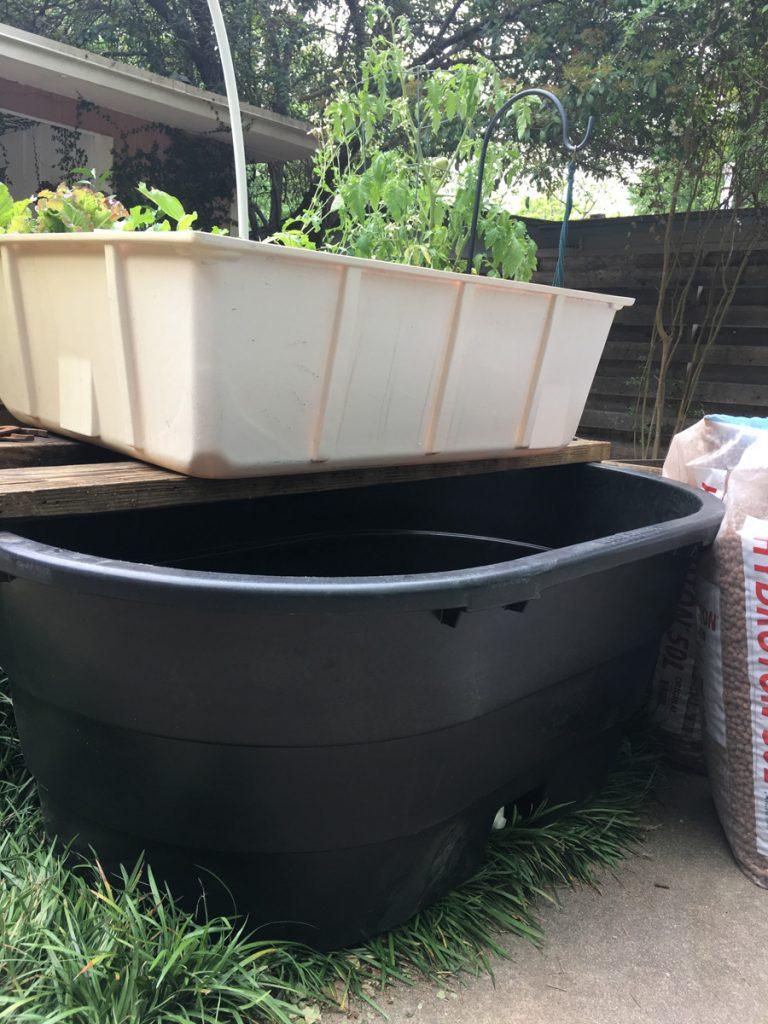
The first thing you need to build a backyard aquaponics garden is a fish tank. I would not get anything smaller than 70 gallons if possible. If you have the option, get bigger. I went with a 100 gallon feed tank with a bottom drain. This will let you raise between 5-10 lbs of fish with an adequate sized grow bed.
Grow Bed
The next thing you need is a grow bed. It is important to get a grow bed that is atleast 12″ deep when building an aquaponics system. Most of the bacteria that are crucial or the system live in the bottom of the bed. They need enough room to grow as well as the plants roots. Most hydroponics grow beds will not work because they are not deep enough, however some of the reservoirs will. Since I already had the 100 gallon fish tank I went with a 40 gallon grow bed that had a 4′ x 4′ grow space and was 12″ deep.
Grow Medium
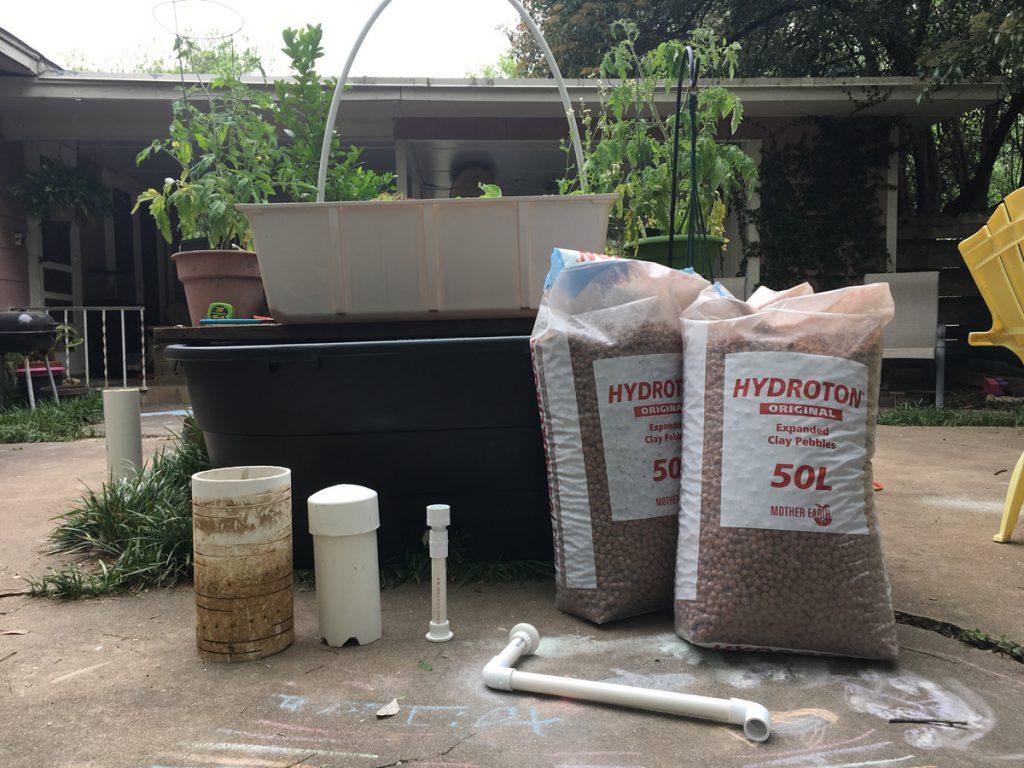
Now you need to get your grow medium. You have a couple of options here, you can go with a gravel, pebbels, hydroton, rafts etc. I used hydroton because I think this is the easiest on the roots. It also weighs less than gravel which makes it easier to work with. I have built aquaponics systems in the past using gravel, when hydroton is not available. It can be done, but I would rather use Hydroton if i can. Since I had purchased a 40 gallon grow bed, I picked up three 50L bags of hydroton to use as the medium.
Aquaponics Parts
We are building to be a traditional constant flow system that will use a bell siphon to transfer the water from the grow bed to the tank. To complete the unit you will need a submersible pump to move the water from the fish tank to the grow bed, 3/4″ hose (around 4′ or a little more to have extra), and a valve to connect to the hose so you can adjust the water pressure. You will also need a bell siphon or the parts to build one.
Bell Siphon Parts
- 3/4″ PVC 4′
- 3/4″ Elbow (2 pieces)
- 3/4″ Bulkhead
- 3/4″ PVC to Thread Adapter
- 3/4″ to 1″ Adapter
- 1″ to 1 1/2″ Adapter
- 4″ PVC 10″
- 4″ PVC CAP
- 8″ PVC 1′
Extras
You will also need a few extra parts and tools to finish the build that you may already have lying around the house. I used two 2″x6″x4′ planks to hold the grow bed on top of the fish tank. I also used a 3/8″ drill pit to drill the hole for the bulkhead at the bottom of the grow bed. If you don’t have this size drill bit, you may be able to get the guys at your hydroponics store to do it for you. you will also need something to cut PVC with.
How to Put together a Backyard Aquaponics System.
The Tank and Grow Bed
The first thing you need to do is find a place to to put your fish tank. Make sure that there is plenty of room around the tank to put your grow bed. Remember this will be a garden, so you will want to put it in a spot that gets plenty of sunshine during the day. You will also want to make sure that you have access to electricity to run your pump.
Once you find the perfect spot you need to make sure that it is level. One way to do this is put some water in the tank. You don’t want to put much water in the tank, just enough to cover the bottom and see how it lines up on the side. When your fish tank is secure place your 2×6 planks across the tank and lay your grow bed on the top.
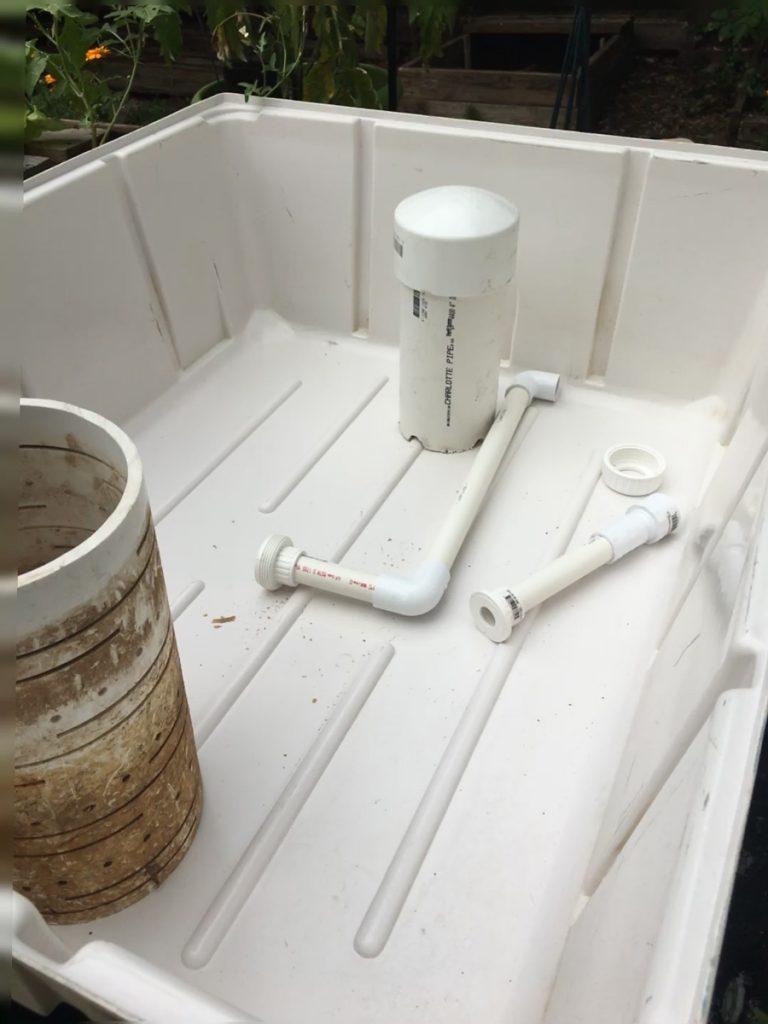
Installing a Bell Siphon
Find the center of your grow bed and mark where you will put the bell siphon. Drill the hole for the bulkhead. Clean out any shavings and install the bulkhead. Place 4 inch cut piece of 3/4″ PVC into bottom of the bulkhead, on the bottom of the tank. Place 3/4″ elbow on 4″ cut then ad another 12″ cut piece of 3/4″ PVC. Place a 3/4″ elbow on the end of that piece pointing down.
Screw the 3/4″ PVC to thread adapter into the top of the bulkhead, inside the grow bed. Place 3″ cut piece of 3/4″ PVC into other end of adapter. Place 3/4″ to 1″ adapter on top, then the 1″ to 1 1/2″ adapter to that piece. It will began to look a bit like a funnel.
Cut little teeth, about a 1/2″x1/2″ out of the bottom of the 10″ piece of 4″ PVC. this is to let the water flow through the bottom. Place the 4″ cap on the other end of the 4″ piece of PVC to make your bell.
Finally you need to make a screen to go around the bell siphon unit. This needs to let water flow in and out simply, without letting any of the grow medium in. Start drilling holes and making cuts into the 8″ piece PVC you have. Do it all around, and up and down the entire piece so water can easily flow.
Adding the Grow Medium
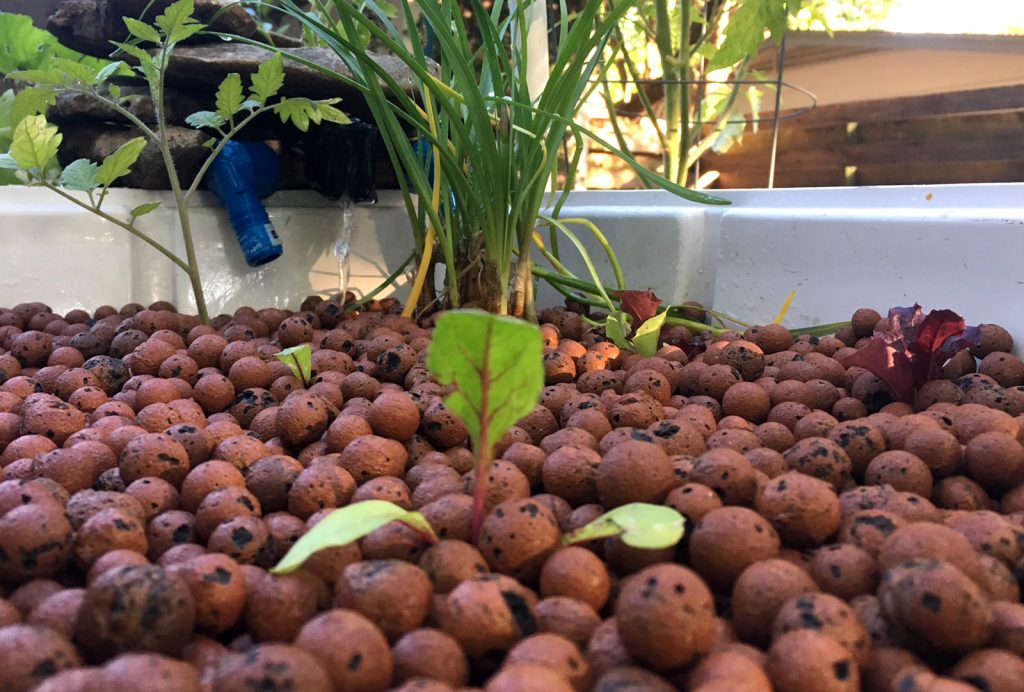
Once you get your bellsipon installed and your screen up, you can start to add your grow medium. If you are using gravel or hydroton you are going to want to rinse it off before adding it the system. One way to do this is to add it to the grow bed and run a few cycles to rinse it off, then use that water in your other garden and replace it with clean water once the medium if flushed out.
Tuning the Bell Siphon
Now you need to add a pump to the fish tank with a hose leading up to the growbed. Put a water pressure valve on the intake to the growbed so that adjust the water pressure. Adjust the water pressure so that it is more than a trickle, but not a strong flow. You adjust the water pressure to fine tune the bell sipon. Too much water and it will turn on but not turn off, too little water and it will drain but never clear out the bed. Adjusting the intake into the tank will make it just right.
I would wait a few days before adding fish and plants. Depending on what type of fish you will be using will determine how long you should wait before adding them to the system. Tilapis and goldfish are hearty fish and can be added in a few days. Other fish will need the water to be cycled through which can take a couple of weeks.
The rest is up to you. On this unit I added some old wood planks up-cycled from a children’s play set to cover the grow bed. I also added the PVC frame and shade cloth so the plants have a chance during the hot Texas summer heat just around the corner.


Leave a Reply